Early last month I got to attend Judith Traeger’s “Exploring the Surface” workshop which was a program offered through my local Rocky Mountain Creative Quilters’ Guild. Judith is a very well-known, internationally exhibited quilt artist and teacher, and one of the group of founders of Denver’s Front Range Contemporary Quilters Guild (FRCQ).
It was such great fun to get to play all day long for 2 straight days with a myriad of fabric surface design techniques – stencils, screen printing, stamping, mono-printing found objects, and texturizing (with paint, paint sticks, rollers, sponges, texture plates).
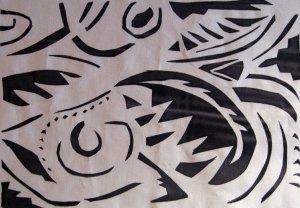
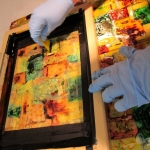
The images above and below are a large yardage of fabric that I created by screen-printing a single stencil repeatedly in a “registered” sequence, to create an all over pattern on the cloth (above) and an experiment of printing 2 different stencils randomly around 1 piece of hand-dyed fabric (below).
5 Tips for Exploring the Surface
I have a pretty extensive printmaking background already, so much of all the great information that Judith covered in the workshop wasn’t really new to me. This was a 2 day gift I gave myself to be able to meet Judith, experiment and play and enjoy being around other artists from my local guild. I did learn some new things and was reminded of some things as well. Below are some tips that I thought might be helpful to others:
- The best needles to use when quilting tops that have a lot of paint on them are either top stitch (90/14) or jeans/denim (size 16) needles. Either of these should adequately handle stitching through painted fabric.
- There are a wide range of water-based paints that can be used effectively with a silkscreen. Any paint that has a polymer plastic base will do (including regular old house paint). We used water-based pure pigments mixed with a polymer base. The key is to adjust whatever paint you decide to use to a proper consistency (using appropriate base/medium) to be able to print with it. When acrylic paints dry, they are permanent and will long outlast the lifespan of the fabric they are printed on.
- Sunlight dishwashing GEL can be used as a discharge agent to remove color from fabric. Once the gel is set, you need to wash it out with water and then soak the fabric in
white vinegareither Anti-Chlor, Bleach Stop, or Hydrogen Peroxide to stop the bleaching action. See this webpage for more details about ways to neutralize bleach on fabric. (Thanks Nora for this corrected info!) - When preparing your silkscreen frame by taping all around it with duct tape to protect the wood frame from water/warping when you wash the ink out of it after printing, it’s best to let the screen sit overnight after taping and before printing, to allow the tape to “cure” before getting it wet. I also think using the new “gorilla” water proof duct tape is most preferable to use for silkscreen frames, since it truly is waterproof once applied.
- An effective way to create depth in a 2D art quilt is to start with a pieced top base layer (background), use silkscreen, painting, and stamping to create a middle ground, and add applique, stitching, and embellishments as the foreground.
And above all else, (as Judith says), always bring a sense of humor to what you are doing. I sure enjoyed the workshop and Judith’s refreshing approach to teaching – Take one of her workshops if you get a chance!


