Halloween is a distant memory and we’re shooshing on into the holiday season. This week brings the close of one show (SOFA Chicago) and the opening of another (Holiday group show at Gallery 360 in MPLS). I have 3 other shows currently in progress in Auburn (NY), Guilford (CT), and Denver (CO) – please see my Exhibits page for full details.
The show at Gallery 360 includes 25 of my personal badges and the opening reception is tonight, 11/14 from 7-10 pm. If you’re in the twin cities area, please stop by the reception if you can – while I won’t be at the opening event, my artist partner Barbara Gilhooly WILL be in attendance as she is the featured artist with her solo show “The Language of Patterns” opening in the main gallery.
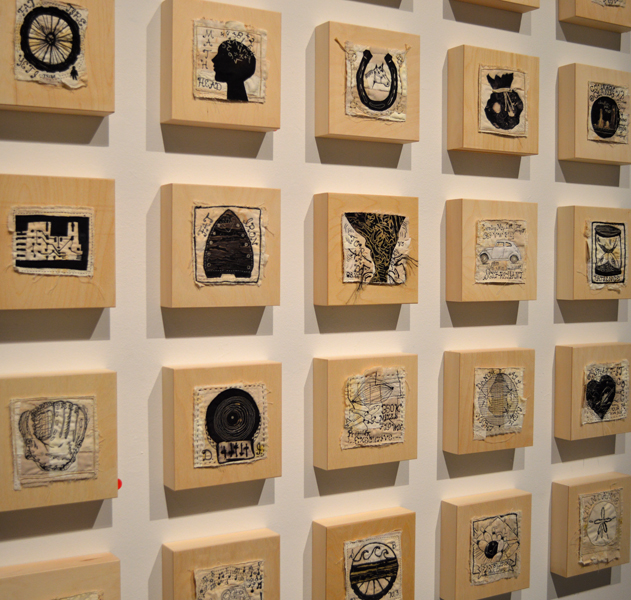
a selection of my personal badges
Mounting my personal badges on wood panels
One of my blog readers asked me recently if I could share how I mount my personal badges to the cradled wood panels. There are two things I feel are important when considering how to mount my textile pieces for hanging – 1) I want it to be archival and 2) I want it to be easily “undone” if a collector wishes to display the work in a different way.
To mount my badges, I drill holes in the panels and then simply stitch the badges to the panels using needle and thread. This method meets both of my criteria above. The steps I use for mounting are pictured below – for some reason, the board game Operation always comes to mind while I’m stitching the badges to the panels!
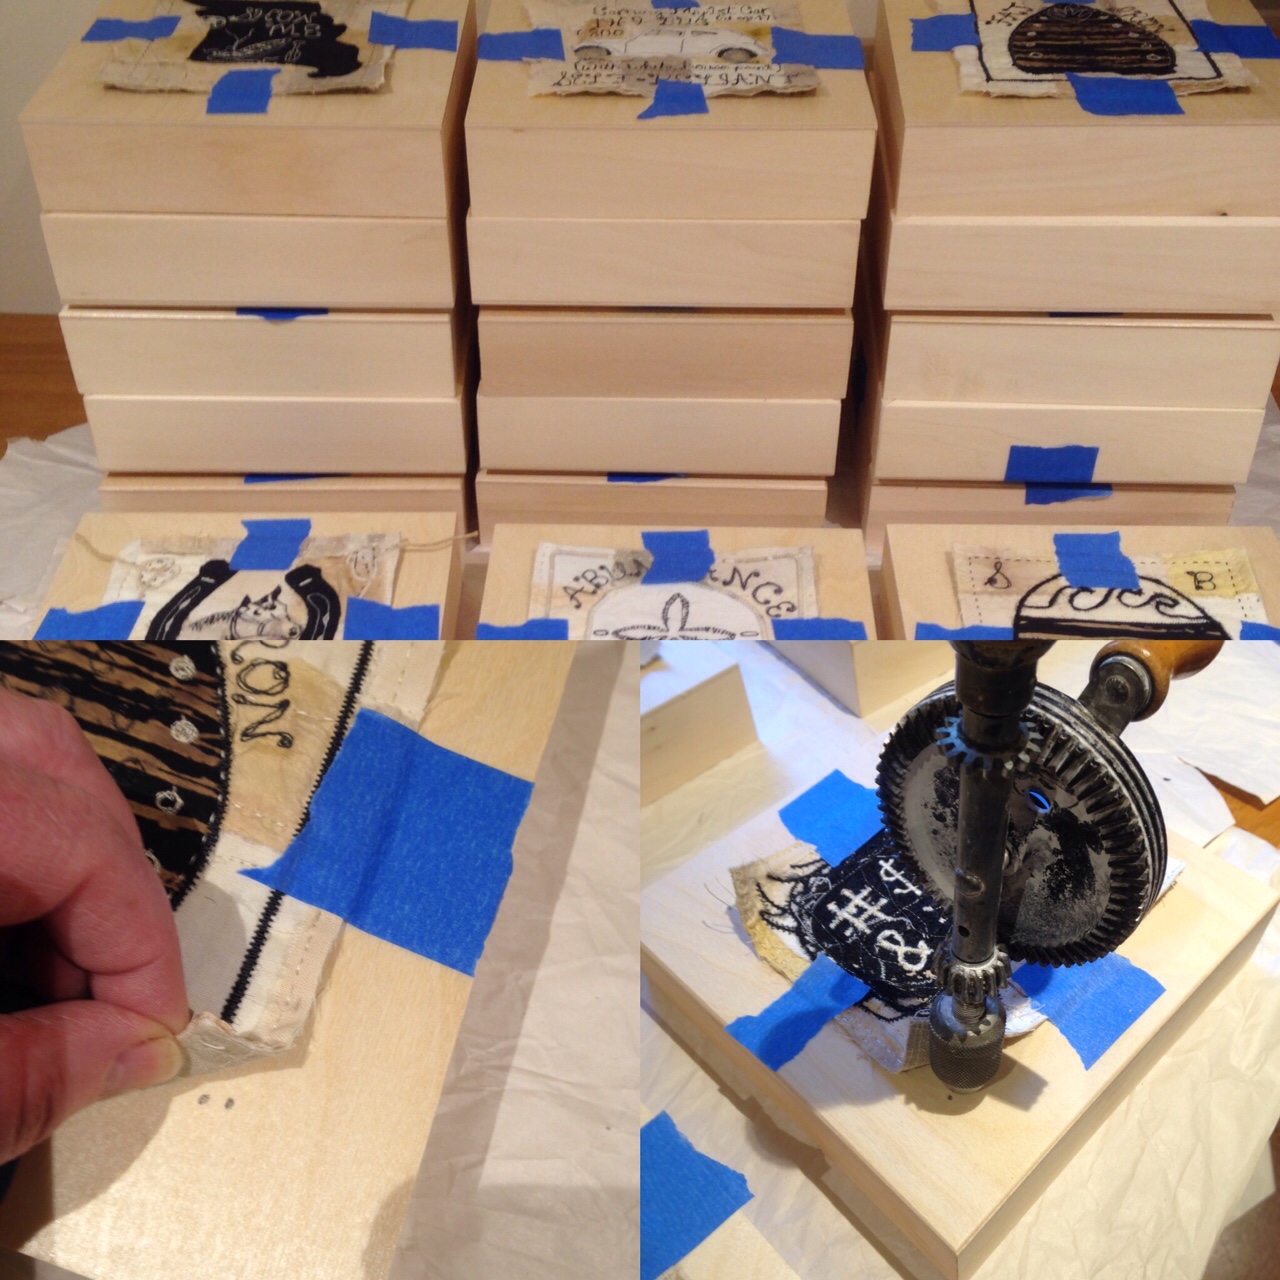
Step 1 – I center the badge on the panel and then using acid-free tape, I tape it down lightly to hold in place.
Step 2 – I mark two small dots on the panel with pencil, underneath each of the edges of the 4 corners of the badge.
Step 3 – Using my Grandpa’s handy dandy hand drill and a very teeny bit, I drill the holes in the panel.
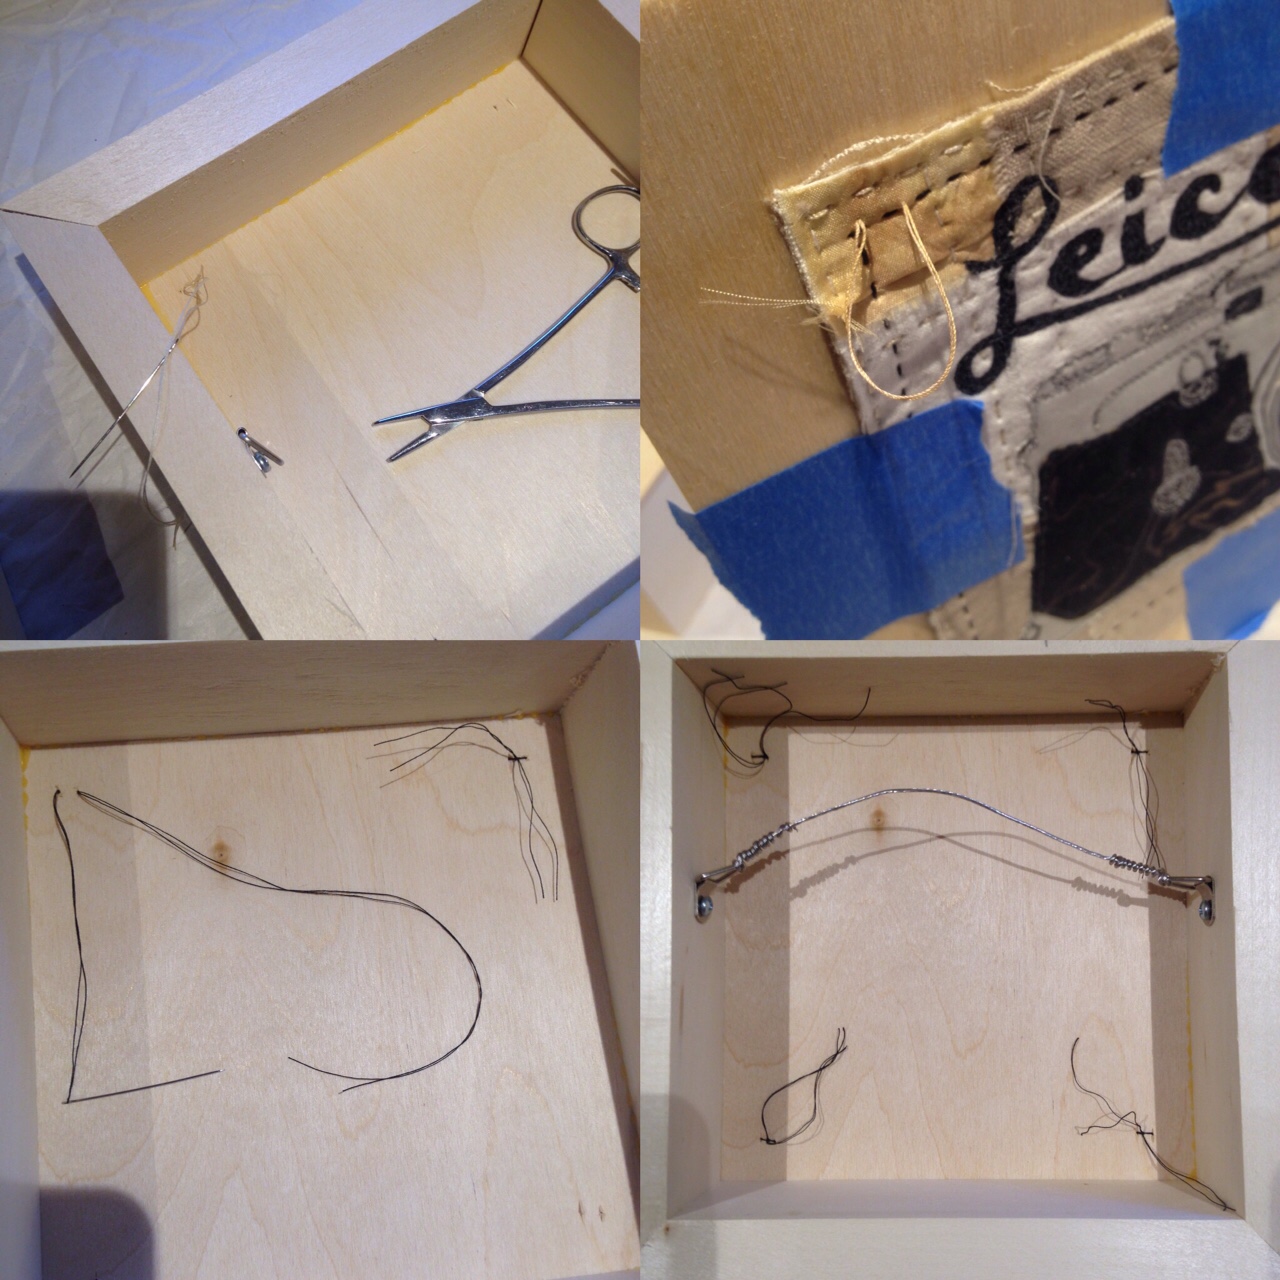 Step 4 – I take a very small thin needle with a 2 ft length of thread, and starting from the back of the panel, insert the needle in one of the holes pushing to the front and through the badge. Then bring the needle from the front to the back through the other hole in that corner.
Step 5 – Adjust the thread so that it is even and then I tie a couple of knots tightly on the back and trim the excess thread.
Step 6 – Remove the tape from the badge, add the hanging wire, and the piece is ready to hang.
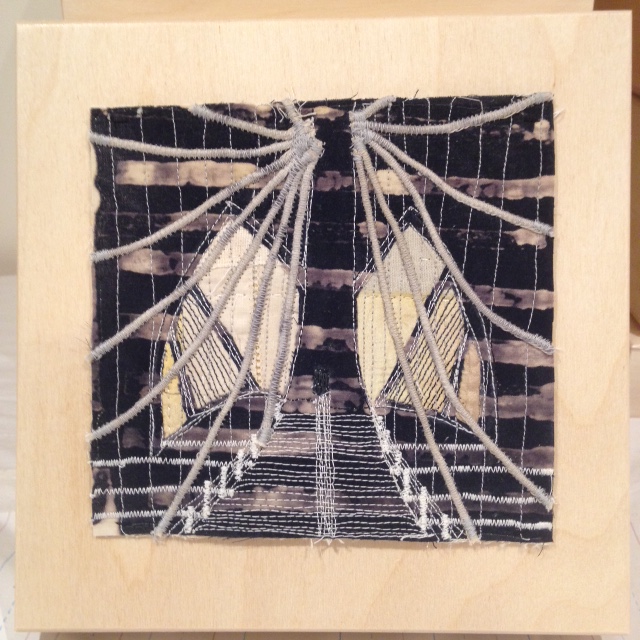
“NYC: Brooklyn Bridge”, 8 x 8 inches, hand-dyed fabrics, stitching, birch panel. © Ayn Hanna
Simple as that.
This is one way to mount textiles for wall display. What other ways have you found work well to display textile wall art?
![]()


Wonderful! Thank you for sharing. Enjoy!
This is a fantastic way to achieve what I’ve been struggling with- elevating textile art by giving it a place on the wall, while maintaining the connection to the value of accessing/witnessing the reverse or underside of a piece. My solution has been to build a frame and then to stretch my work like a canvas over each frame, so that it can be seen on the reverse when desired. Your method has a different ease I find quite appealing, and a nice frame effect from the smooth wood surface. Thank you so much for sharing!
Sure thing, I also “frame” some of my pieces in a similar way as you describe – by wrapping them around a stretcher frame, basically gallery-wrapping the piece – I do this with my dye drawing pieces as it seems the best way to objectify them almost like paintings hanging on a wall.
I’m just catching up on blog posts and i noticed this one. how big do you think you piece could be using this technique? i’m just wondering at what size you think the weight of the fabric would pull at the stitches….this is awesome. Thanks for posting this I’ve been thinking about my options for displaying any fabric pieces I create.
Hi Ann! So great to hear from you. My “Moondance triptych” pieces are mounted this way and they are 24 x 24 inches – At this size, we did drill additional holes in the panels, in the center areas of the pieces and added additional stitches to tie the pieces to the panel to keep it taut. I would probably add additional drill/mount holes at intervals along both the edges and in the interior of the panel (like in a grid formation) on any size above this 8 x 8 inch size to keep the piece secure.
Excellent! I have been working on some small tapestry pieces and had never considered doing something like this for mounting. Usually small tapestries are sewn to fabric which is stretched on frames. There is no reason small pieces couldn’t be mounted this way and I like the lack of fabric behind the piece. Thanks!